After a round of user interviews, it is important to consider how the research findings are going to be consumed by other team members so your research effort is not wasted.
Here’s my process from a recent project that shows how I turned user interview notes into design actions. I hope it can help you design better products based on the feedbacks you gathered!
The project

I was hired by a small saas startup to design an educational portal that introduces green building materials to first time home renovators.
I created a high-fidelity clickable prototype with InVision and interviewed 5 participants via Google Hangouts.
Research Objectives

Enable the team to hear from the users directly
Because I was the only interviewer, I wanted to make sure the other team members can hear the users’ own words.
This was accomplished in the form of interview video clips and direct quotes from users.

Avoid creating extra work to consume research findings
The small saas company has less than 10 people, and they don’t use any project management software. However, team members all have access to Google accounts.
Therefore, Google Docs and Google Sheets were the tools of choice for sharing the research findings.

Enable research-based decision making
Because of the tight deadline, I needed to iterate the designs once the user interviews were done.
Categorization and prioritization of notes were extremely helpful in quickly seeing aspects of designs that can be improved.
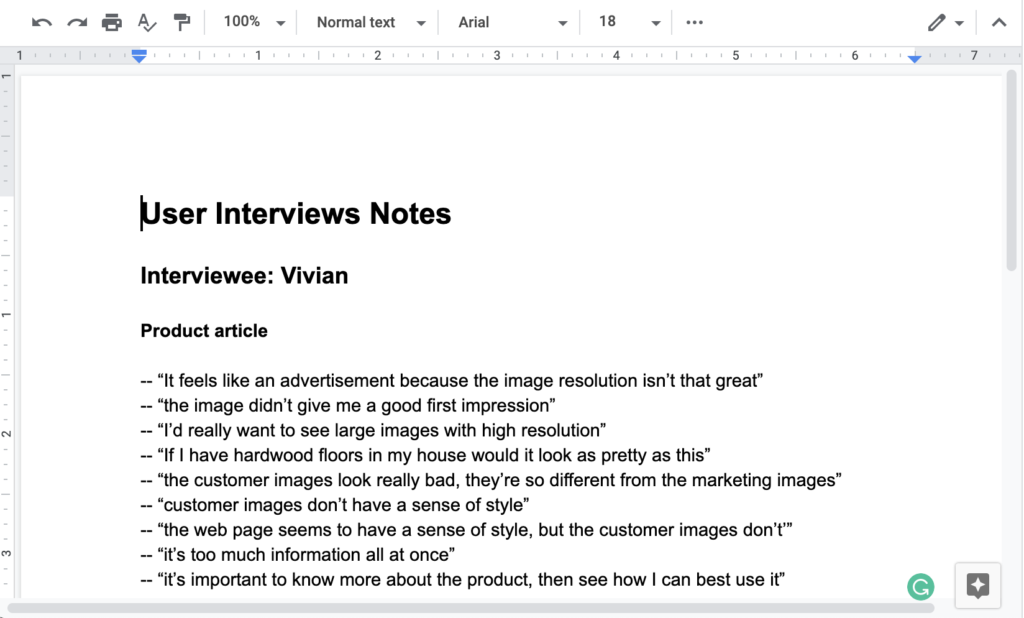
Step 1. Combine all interview notes into a single document

I transcribed the user interview videos and put all the notes into one single document.
This enables team members to browse through notes quickly if they don’t have time to go through the videos.
Moreover, it makes searching for a specific pain point, for example, “upload”, easy across multiple interviews.
Step 2. Organize notes based on features

During the interviews, users often go back and forth between features while giving feedbacks.
Organizing research notes based on features allowed me to see common feedbacks regarding specific features.
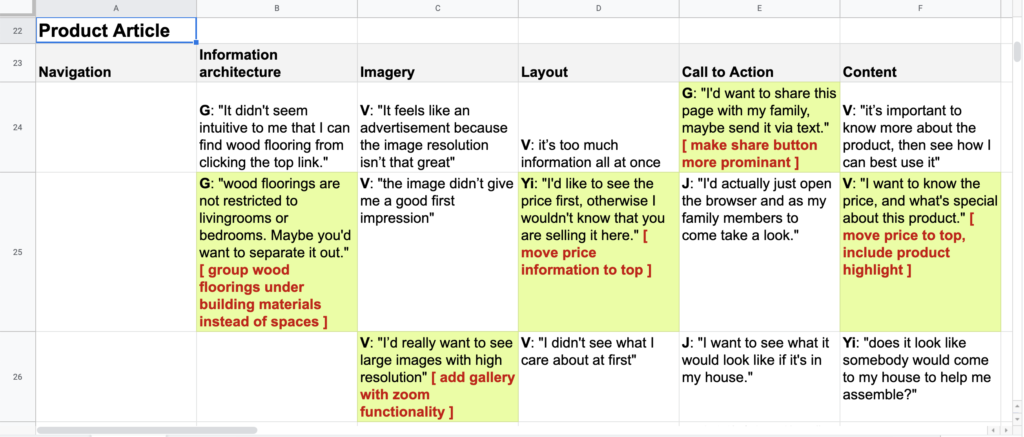
Step 3. Organize notes into design categories

Since the project was heavy on content, I categorized all the notes into these major design elements:
- navigation
- information architecture
- content
- imagery
- layout
- call to action
This allowed me to start envisioning what kind of design changes could improve the user experience.
Step 4. Highlight prioritized user feedbacks

After seeing common patterns on a specific feature, I prioritized some feedbacks and highlighted them so other team members can see what’s important at a glance.
At this point, all the user feedbacks are still in their raw form — direct quotes. I wanted the team members to “hear from the users directly.”
Step 5. Translate user feedback into design actions

Lastly, I included suggested design changes that would improve the user experience from highlighted feedbacks.
This way, team members can see the updates that I plan to do, and why these decisions were made.
Wrapping Up
The process of translating research into design decisions can be very different depending on the size of the project and the kind of teams you work with.
I hope this process can help you come up with your own process and make sure your user research is acted upon and contribute to better user experience!
